Are you trying to find reliable information on repotting Spider Plants? You’ve come to the right place because this detailed step-by-step guide will teach you when and how to repot Spider Plant, and how to give it the appropriate repotting aftercare.
You should repot your Spider Plant in the following cases:
- when the plant has outgrown its container
- when the plant is growing in an improper soil mix/staying wet too long
- when the plant has developed root pest or root disease issues
- if the plant hasn’t been repotted in a year
1) Plant Has Outgrown Its Container
It’s important to provide the Spider Plants with enough room to grow so their root system can function optimally in order to absorb all the necessary nutrients from the soil. You can easily check if your plant has run out of space to grow. Just look at the drainage holes on the bottom of the pot. If the plant’s roots are poking out of the holes, it’s time to repot spider plant and provide it with fresh soil, rich in nutrients.
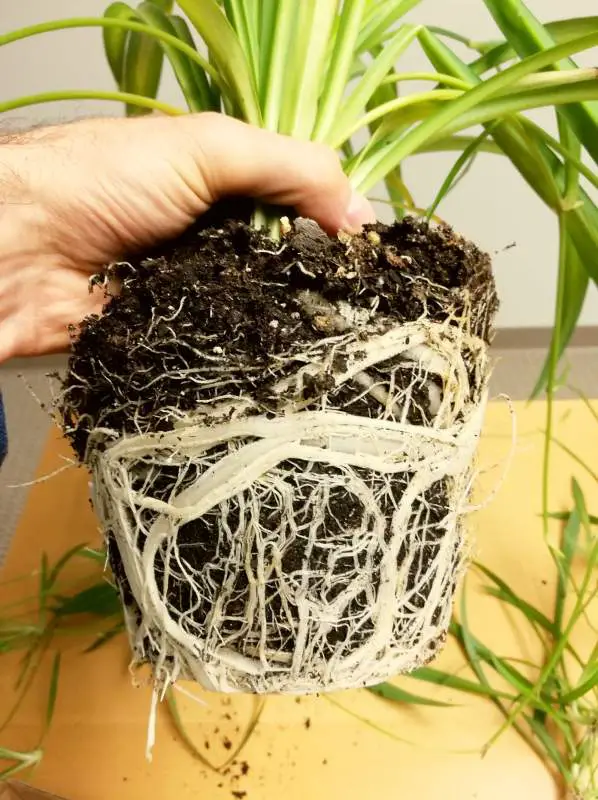
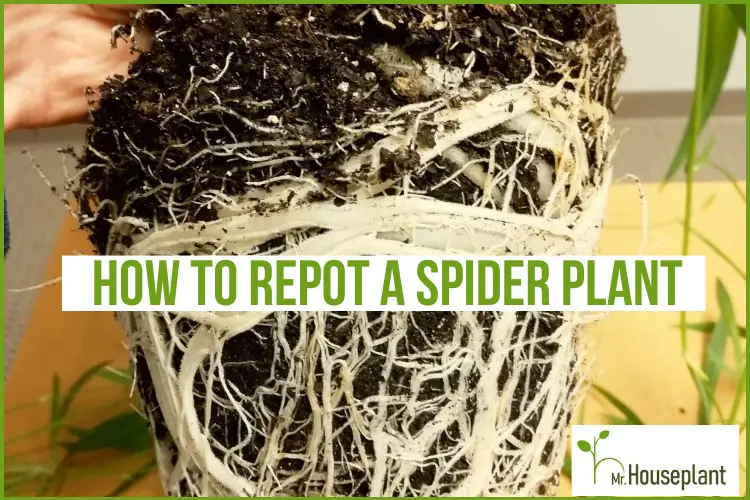
A root bound spider plant with a large root mass and not much soil indicates that the plant needs a repot
Another way to check if a Spider Plant has outgrown its container is to gently pull it out of the container. If you see mostly roots and not much soil, it’s a clear indication that your plant should be repotted.
2) Plant Is Growing In An Improper Soil Mix/Staying Wet Too Long
If Spider Plants are growing in an improper soil mix that retains too much water and doesn’t have enough oxygen, they will be more prone to fungal infections and root rot. A proper soil mix is vital for keeping your Spider Plants happy and healthy. A proper soil mix has 20-30% large particles, such as coarse perlite, bark or pumice.
Over time, the soil will compact naturally. When this happens, the Spider Plant roots will get less oxygen. Less oxygen means the plant has a higher chance of root rot. Repotting the plant in a proper soil mix will provide it with well-draining porous potting soil that promotes root health.
3) Plant Has Developed Root Pest Or Root Disease Issues
Spider Plants suffering from root pests or diseases should be promptly repotted to prevent further damage to the plant. When you take your plant out of its pot, take a careful look at the root ball. If you notice that the roots are mushy, smelly, or rotten, it means that they are affected by a root disease. This calls for a swift reaction in order to save the plant. Before repotting the plant with a root diseases, make sure to prune all the infected parts (softy, mushy, smelly parts), to prevent the infection from spreading.
4) Plant Hasn’t Been Repotted In A Year
You should repot your Spider plant at least once a year. Giving your house plant fresh new potting soil annually will provide it with enough nutrients that are vital for its growth and health. It also provides non-compacted soil with plenty of oxygen for the roots. Also, if you repot Spider plants once a year, you won’t have to fertilize them, because the fresh soil will provide them with sufficient nutrients.
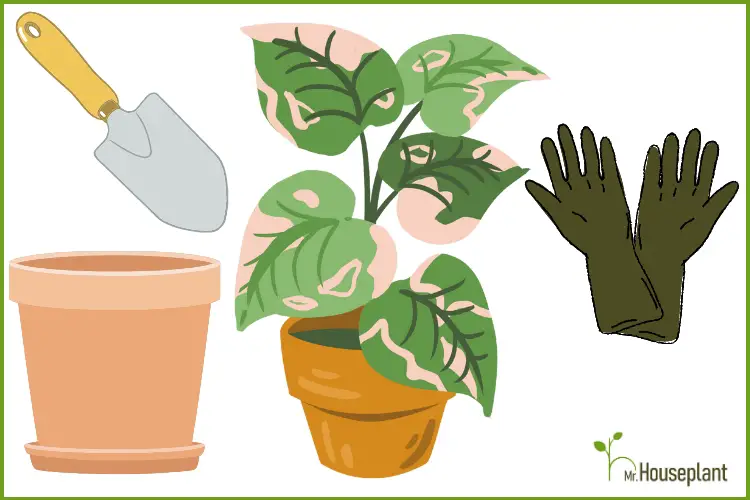
Tools Needed
For Chlorophytum Comosum repotting you’ll need the following tools:
- Sanitized pruning shears
- A new pot
- Potting mix
- Repotting rake
How To Select Pot Type
Ensuring adequate drainage for your plant is the most important thing when choosing the right pot. Different pot materials have different properties and benefits. You can choose the pot material and shape depending on your preference.
What Kind of Pots Do Spider Plants Like?
Spider Plants like pots with good drainage, so make sure the pot has drainage holes. Good drainage reduces the chances of fungal diseases and root rot and enables the roots to absorb just the right amount of water. It also enables excess salts to exit through the drainage hole.
When it comes to material, there are multiple options for Spider Ivy, such as glazed ceramic, plastic, terracotta (clay pot), etc. Terracotta pots are a great choice since these pots absorb moisture from the soil and hence the soil dries out faster. Given that Spider Plants don’t like to sit in waterlogged pots, terracotta pots (clay pots) are an excellent choice.
Plastic pots are cheap and they come in a variety of shapes and colors. However, the color can fade, the pots can become brittle in the sun and they are generally not as attractive as terracotta or ceramic. Glazed ceramic pots are attractive and on the heavier side.
Whatever material or shape you choose, always check the drainage, since it’s very important for the well-being of your Spider Ivy.
How To Select Pot Size
To select the pot size, check the measurements of the pot you’re currently using. If it’s up to 4 inches in diameter, select a pot that is 1 inch larger. For pots larger that 4 inches, choose 2 inch larger pots. For example, if you have a 6” pot, go for an 8” pot. If you have an 8“ pot, choose a 10” pot.
Selecting an adequate pot size is an important step when repotting Spider Plants. On one hand, the plant should have enough space to grow comfortably, while on the other hand, the pot shouldn’t be too large. If the pot is too large, it will take more time for the soil to dry out. If the soil is too wet for extended periods of time, the plant will become vulnerable to fungal infections and root rot.
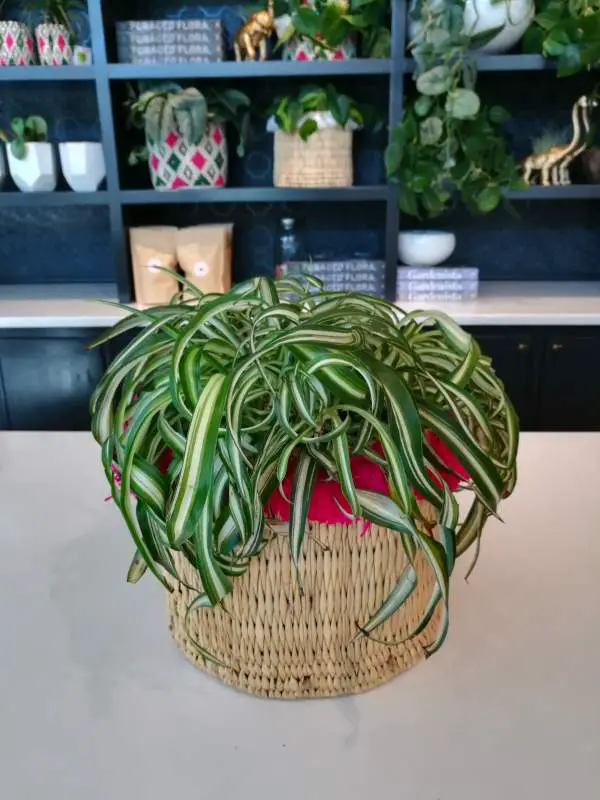
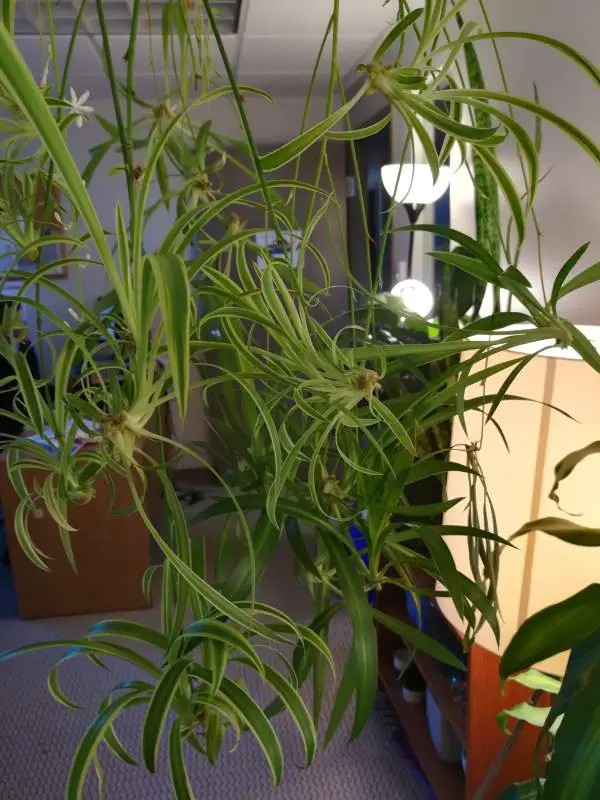
A beautiful and healthy Spider Plant, (Airplane Plant, Spider Ivy or Ribbon Plant), showing off its foliage
What Soil Do You Use To Repot A Spider Plant
You need to use well-draining soil to repot a Spider Plant and you can make your own mix by following this recipe:
- 2 parts of any commercial potting mix
- 1 part of perlite
- 1 part of bark
The roots need oxygen, and amendments like perlite and bark have a larger particle size. This creates oxygen-containing macro pores which reduce soil compaction and keep the roots healthy and robust.
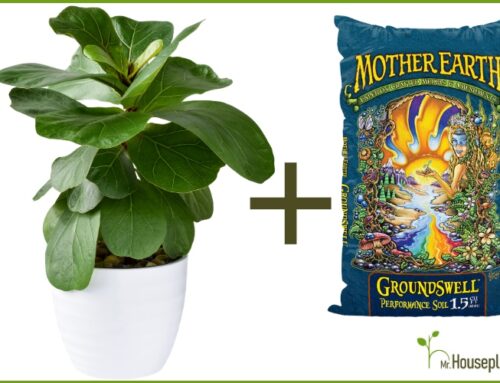
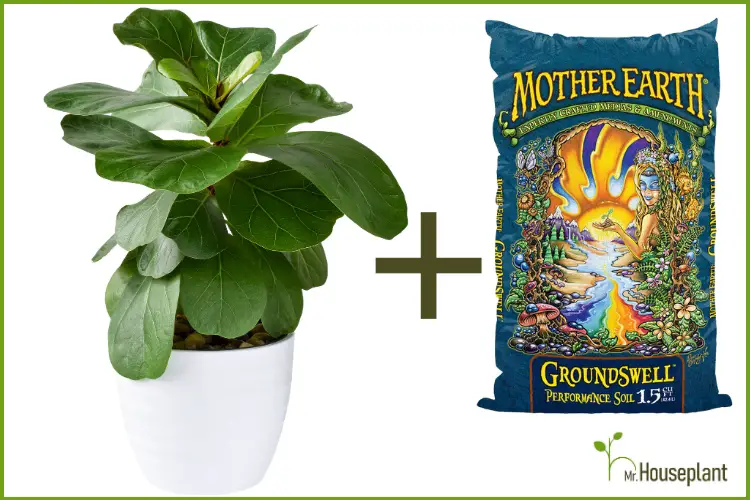
Spider Plants don’t like staying wet for too long, they prefer being on the dry side. That’s another good reason to use a well-draining potting mix. In case you don’t want to make your own mix, you can use potting soil that is already well-draining, like Mother Earth Groundswell.
Spider Plant Repotting: Step By Step
To repot your Spider Plant take the following steps:
- Remove spider plant out of the pot
- Gently loosen the root ball
- Inspect the roots
- If they are sick, mushy, or smelly, prune them with sterilized shears
- Select the appropriate new pot (one size larger than the one you’re currently using)
- Prepare the potting mix
- Fill the new pot up to ⅓ with the potting mix
- Put your plant in
- Fill in the remaining space with soil
- Press the soil around the plant firmly to help it settle down
- Water the plant if the soil was dry before repotting
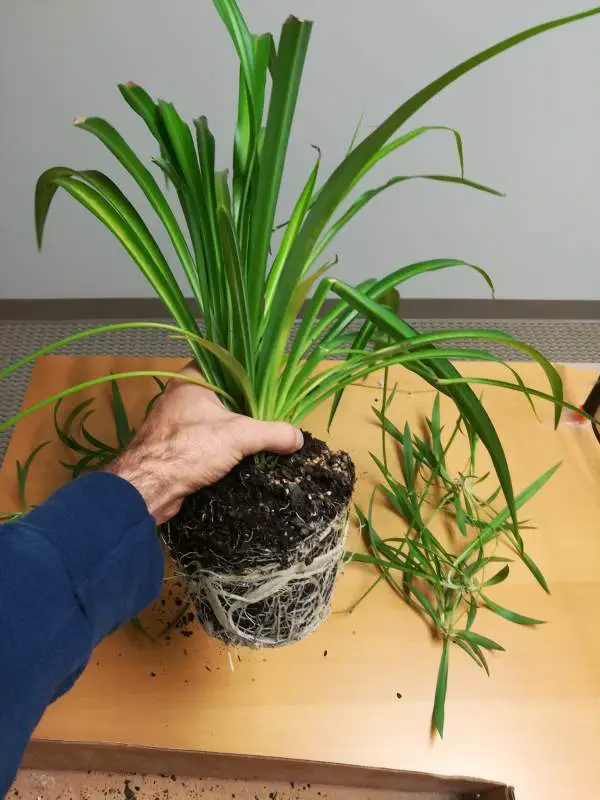
Mother plant Chlorophytum Comosum with baby Spider Plants ready to be repotted
The above-described method is known as potting up. This method is recommended if you don’t have a lot of experience. When you do a pot up you mostly leave the roots and soil around them intact.
However, potting up is less efficient than full repotting, which involves removing all the soil when you take your plant out of its pot. Full repotting gives more space for the roots, so the plant can get all the nutrients and oxygen from the fresh soil. If you’re experienced with Spider Plant care, you should go for full repotting.
Note that full repotting can temporarily stress a plant and slow down its growth. But it’s better for the plant in the long term because it provides non-compacted soil to the whole root ball, not just around it. It also helps identify any potential problems in the center of the root ball.
Care After Repotting
After repotting a Spider Plant, place it in a warm spot with medium indirect light (between (750 lux and 3,000 lux) or bright indirect light (3,000+ lux). Water your plant when the soil is fully dry to the bottom of the pot. You can use a chopstick to check if the soil is fully dry. Stick the chopstick all the way to the bottom of the pot and pull it out. If it comes out fully clean, with no soil sticking on it, that’s your sign to hydrate your plant. Check out my Chlorophytum Comosum article if you would like to know more about how to properly care for your Spider Plants.
FAQ
How Often Do Spider Plants Need To Be Repotted?
Spider Plants need to be repotted once a year, or more often if they outgrow their pots. You should also repot them if they are affected by root pests or plant diseases or if they have been overwatered.
Best Times Of Year To Consider Repotting
The best time of year for repotting a spider plant is any time of year. There is no reason to wait until spring to repot Spider Plants. Since you’re keeping them as houseplants, they won’t go into real dormancy, because the room temperature is stable. You can safely repot your Spider Plants in any season.
With proper plant care and repotting the mother plant thrives and produces Spider Plant babies and small flowers
Should You Soak A Plant Before Repotting?
No, you shouldn’t soak a Plant before repotting. It will be easier to take it out of the pot when the soil is dry, especially if you use a repotting rake. If you have trouble taking your plant out of the pot and you don’t have a repotting rake, you can try soaking the plant first.
Should You Water A Spider Plant Immediately After Repotting?
If the soil was dry before repotting, then yes, you should water the Spider Plant right after repotting. One reason is to hydrate the soil and the roots, and the other reason is to let the soil settle down. After you water, when the soil settles down, the large air pockets from the soil are reduced, so the roots can get in touch with the soil. If the soil was wet before repotting, you shouldn’t water a Spider Plant immediately after repotting. The best type of water would be distilled or rainwater, but you can also use tap water.
Do I Need To Fertilize My Spider Plant After Repotting?
No, you don’t need to fertilize your Spider Plant after repotting. You have just provided fresh soil full of nutrients, so there is no need to fertilize your Spider Plant for at least a few weeks to a few months.
Why Is A Spider Plant Limp After Repotting?
A Spider Plant is limp after repotting because of repotting stress. A lot of houseplants get stressed after repotting. Just provide your plant with medium indirect light or bright indirect light, a warm spot, and proper watering, and it will recover in a few days to a few weeks.
Repotting Spider Plants when necessary is vital for their health. By repotting Spider Plants, you’re providing them with all the nutrients they need for optimal growth. If you follow all the advice in this guide, you will be a proud owner of a happy Spider Plant.
Yours Truly,


Do you have tips on how to manage the spiderettes while repotting? I know I need to repot, but there’s so many babies, and I don’t want to damage them.
Hi Marie, my main piece of advice is to not be afraid of the spiderettes getting broken or pulled off. That is normal during repotting and for very large plants it’s very difficult to avoid. The broken ones can be propagated or gifted 🙂
If you really want to try to save them all, you want to not have spiderretes be in your way when pulling the mother plant out of the post and loosening the rootball. Take a piece of rope and try pulling the spiderettes to the side slightly, and tying the rope around them, so that they don’t block the base of the plant and the soil from you.
I dont know if I explained it well, but even without using a rope, if you’re gentle, you should be able to repot without most of the breaking off. Good luck 🙂